🚧 This site is a still a work in progress! 🚧
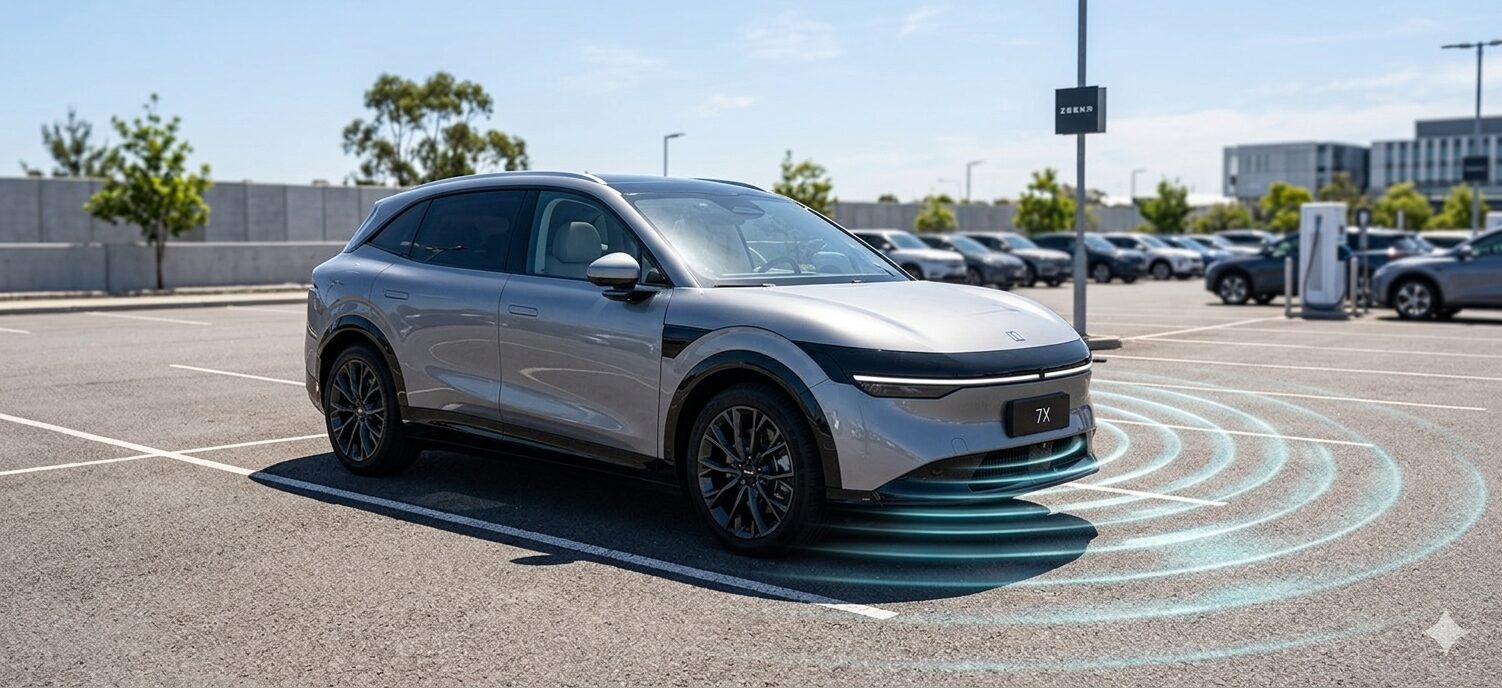

The Zeekr 7X is packed with cutting-edge tech, one of its features is the ability to load custom lock, unlock, and system sound effects via a USB drive. If you are tired of the standard factory chimes, you can personalise it to suit your taste.
However, automotive infotainment systems are notoriously picky about audio formats. In this guide I will show you how to create and use custom vehicle sounds.
If you discover any changes are required please let me know in the comments below.
If you do not have any audio files, you can use pre-made sounds from open Tesla libraries
Tesla sites have large librarys of sounds where many are already in a compatible format and should work with your Zeekr! This may save you time, however you will still need to setup the USB drive as below. (If they aren’t compatible they will not show in the menu’s and you will need to upload to the convertor below)
💻 Preparing the USB Drive
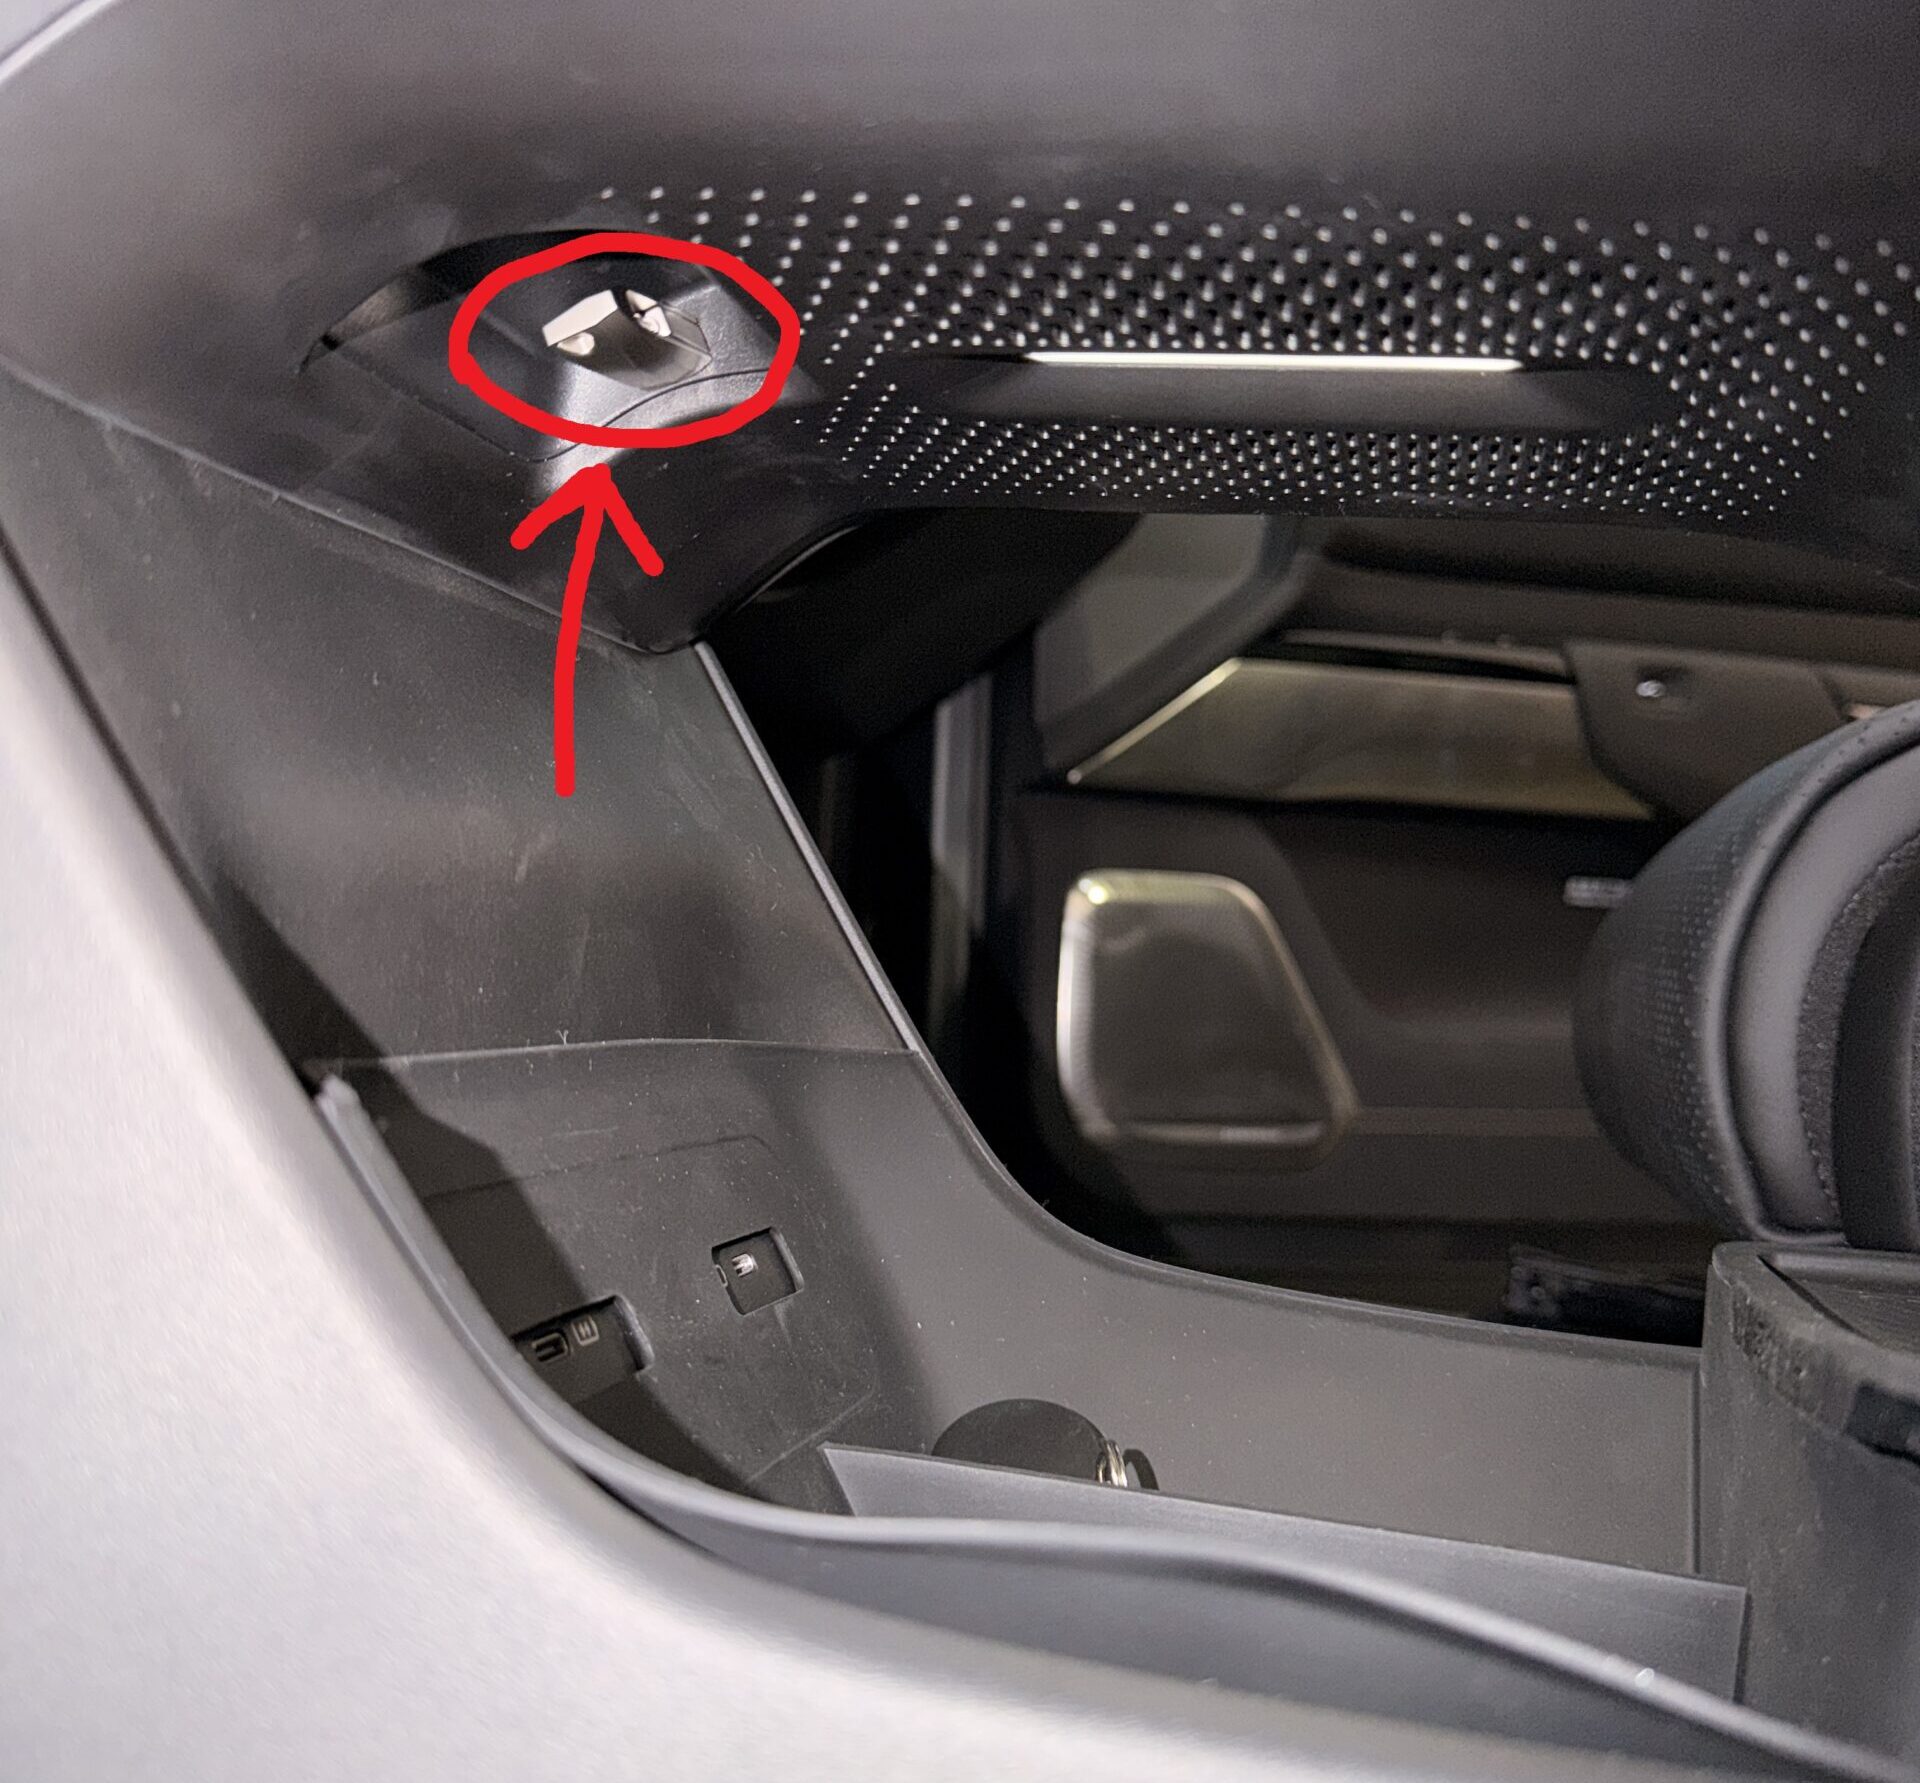
When you picked up your Zeekr 7X the dealership should have installed a USB drive under the centre console. Remove this drive from the car and plug it into your computer.
ZeekrOS is strict. If your USB drive isn’t configured exactly right, the car will not detect your custom files.
If you don’t have a USB drive, you can get a Zeekr themed one. Otherwise, any USB 3.0 drive will do.
1. Partition Scheme & Formatting
Plug your USB drive into a computer and check to make sure it is formatted with the following setting (If you took an existing one from your Zeekr, this should already be correct and you can skip this step.
- File System: FAT32
2. The Exact Folder Structure
Zeekr’s operating system looks for a highly specific, hardcoded folder name at the root level of your drive.
- Open your FAT32 formatted USB drive.
- Create a folder at the absolute root named exactly:
Lock Status Tones.
📂 Drive Path Example: E:\Lock Status Tones\
Pre 2.1 Update you need to use folder name: 解闭锁音效
(which translates to “Lock/Unlock Sound Effects”)
🎵 Mastering the Audio Files
The Zeekr 7X hardware expects raw, uncompressed audio. If you try to drop a standard MP3 or a high-res FLAC file into that folder, the car will ignore it.
Your audio files must meet these exact specifications:
- Format: Standard Uncompressed PCM WAV
- Bit Depth: 16-bit Le (
pcm_s16le) - Sampling Rate: 44.1 kHz or 48 kHz
- Channels: Mono or Stereo
- File Size Limit: under 1.0 MB (Typically, keeping the audio clip under 3 to 5 seconds ensures it stays well under this limit).
You can use this link https://cloudconvert.com/mp3-to-wav to convert any file to the correct WAV format, just ensure that you match the specifications listed here.

Now that you have your audio files, you need to copy them into the folder structure that we created earlier. This is the folder named 解闭锁音效 or Lock Status Tones in your USB drive.
Once these files are copied, you can remove the USB and head to the car.
🚗 Navigating the Zeekr 7X Screen
With your USB drive prepped and your 16-bit WAV files loaded, it’s time to configure your vehicle to use them.
- Plug in the USB: Locate the center console USB port that is tucked under the wireless phone charger. Insert your drive into this port.
- Navigate to Vehicle Settings: This is the car icon located in the bottom right hand corner.
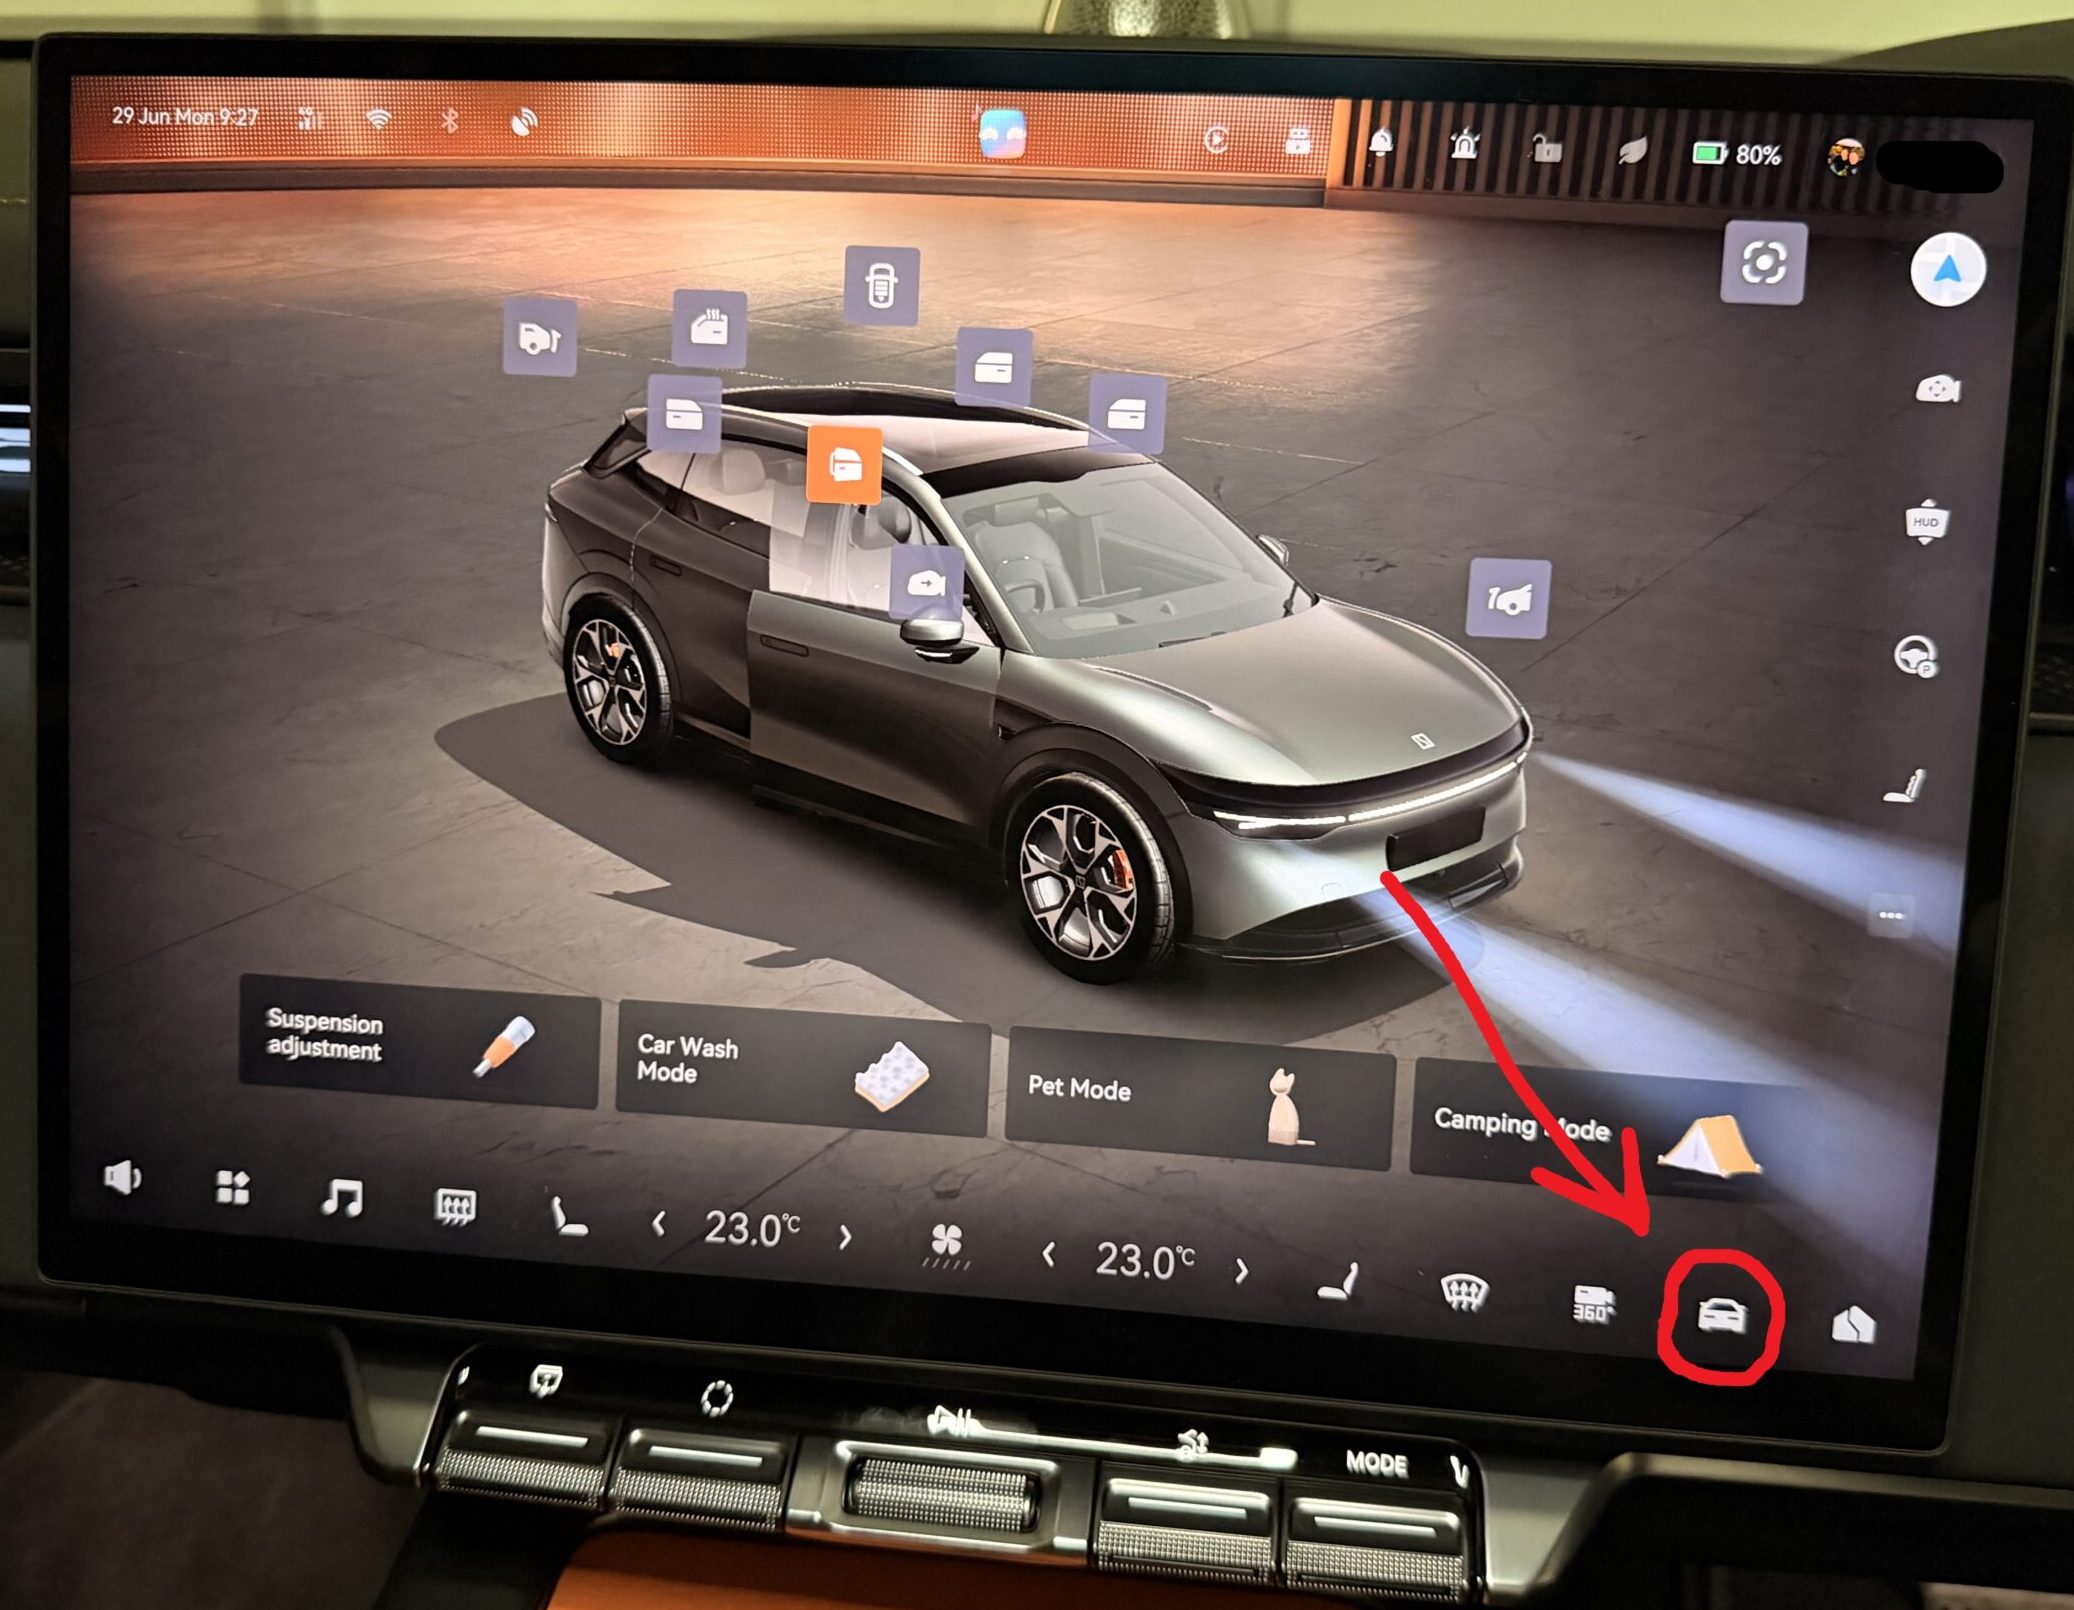
- Select Vehicle Category then Doors & Windows: The lock/unlock sound settings are in this section.
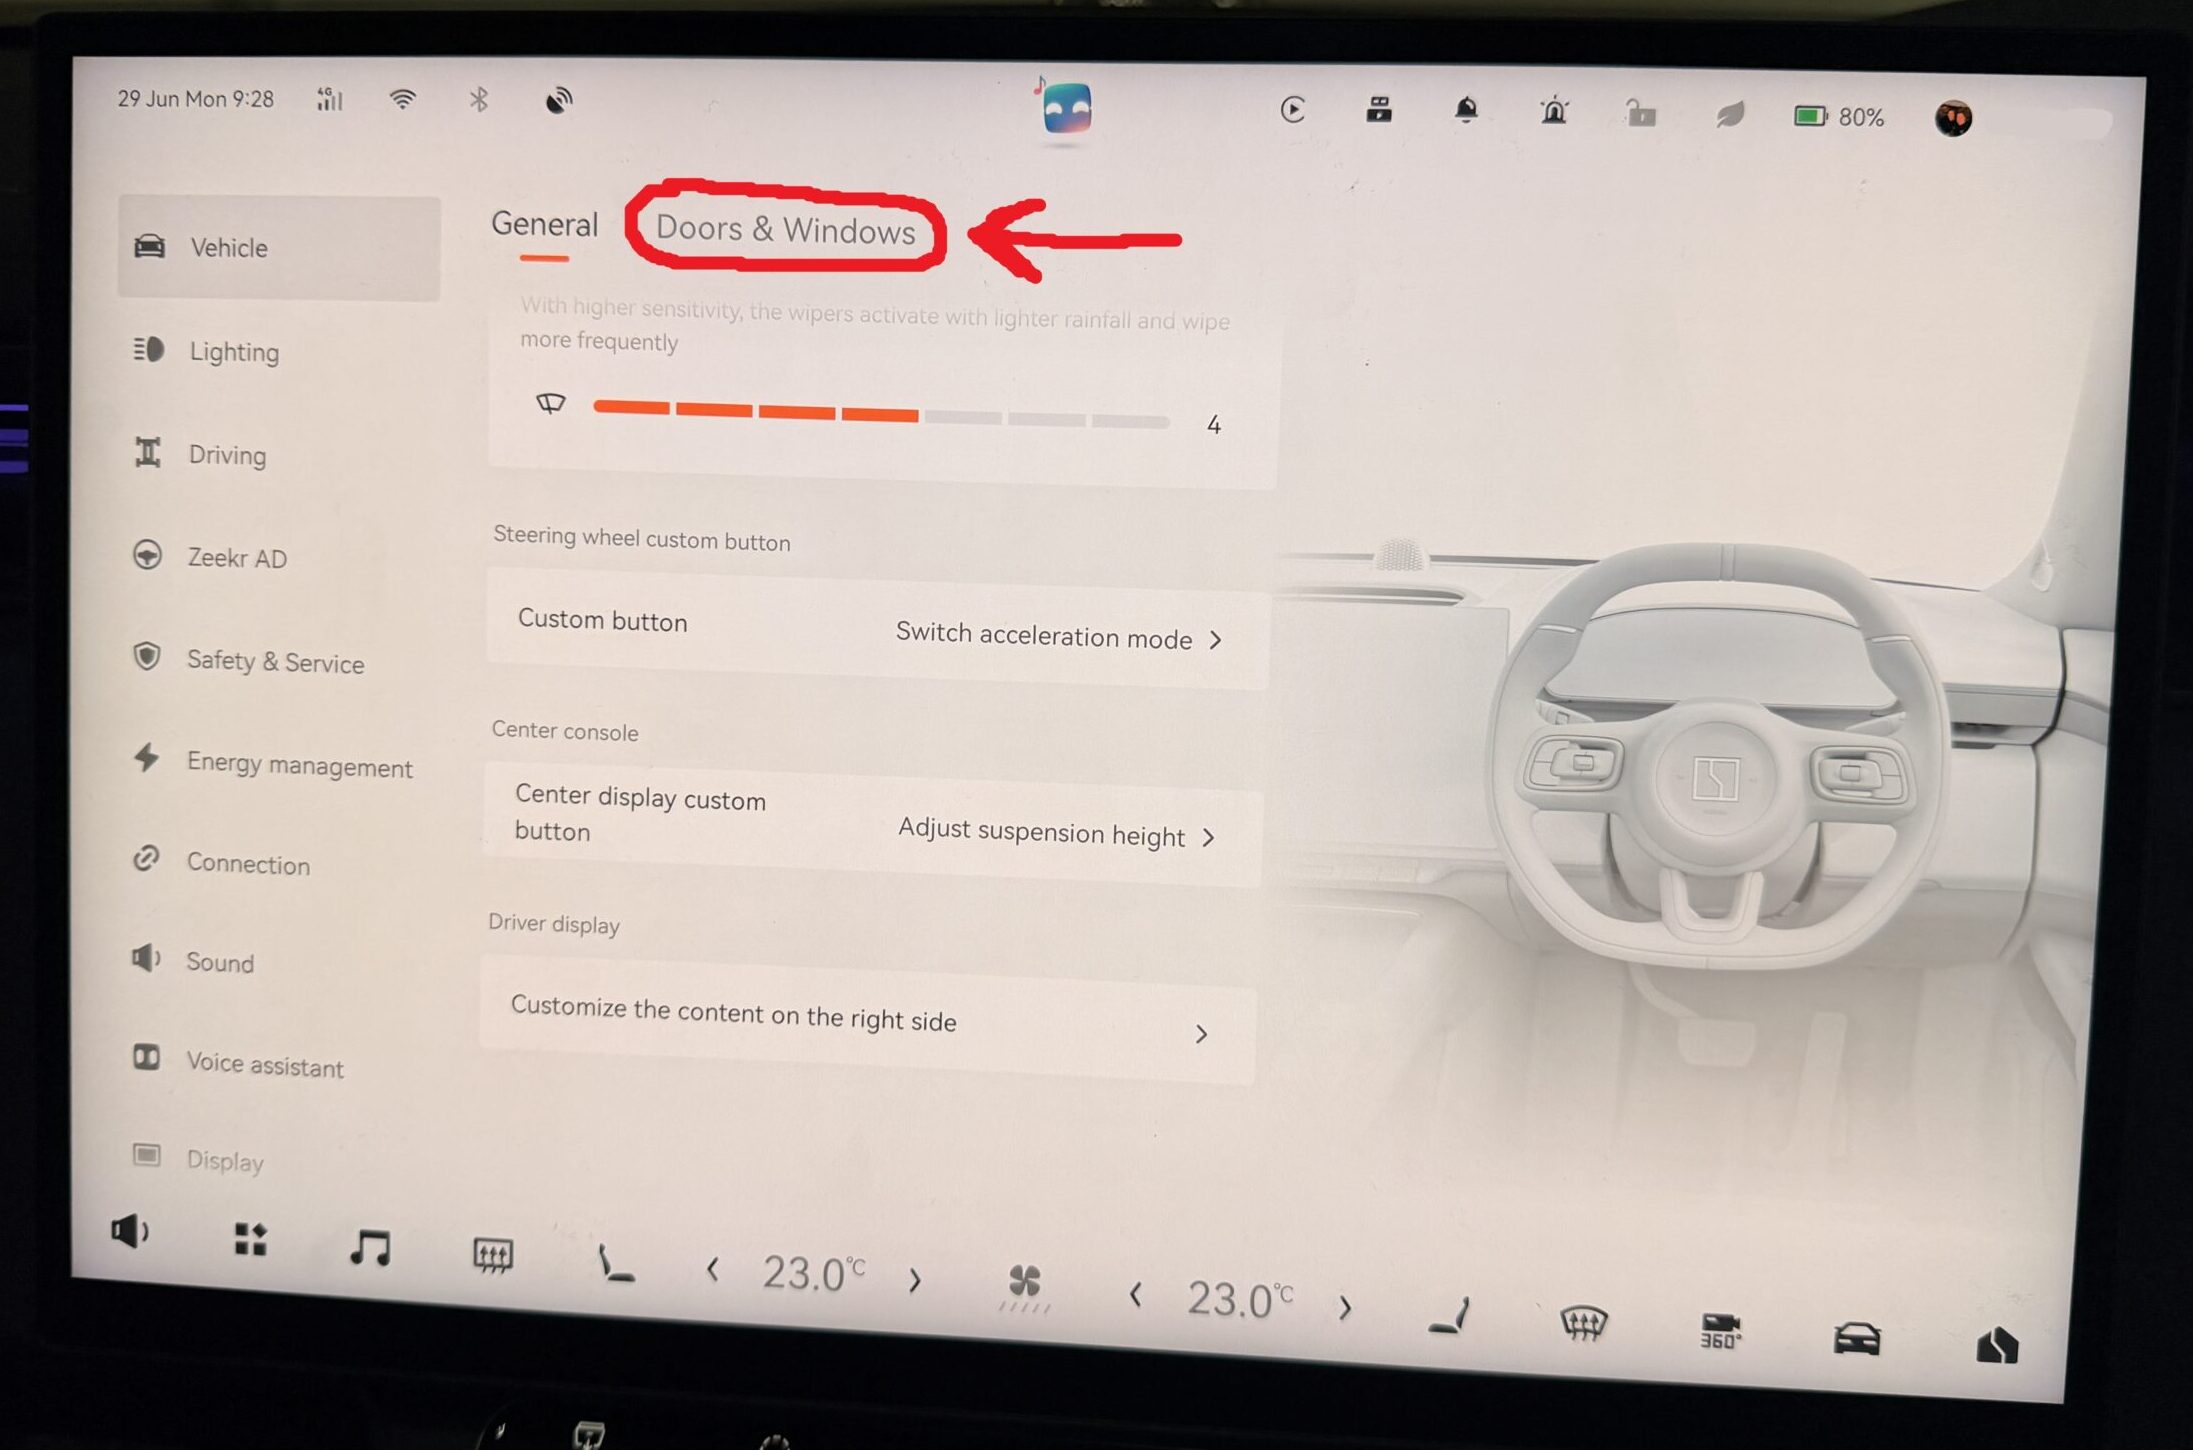
- Scroll Down to Exterior Unlock/Lock Feedback: on this section you MUST select Hazard lights + sound.
No other option allows for custom sounds.
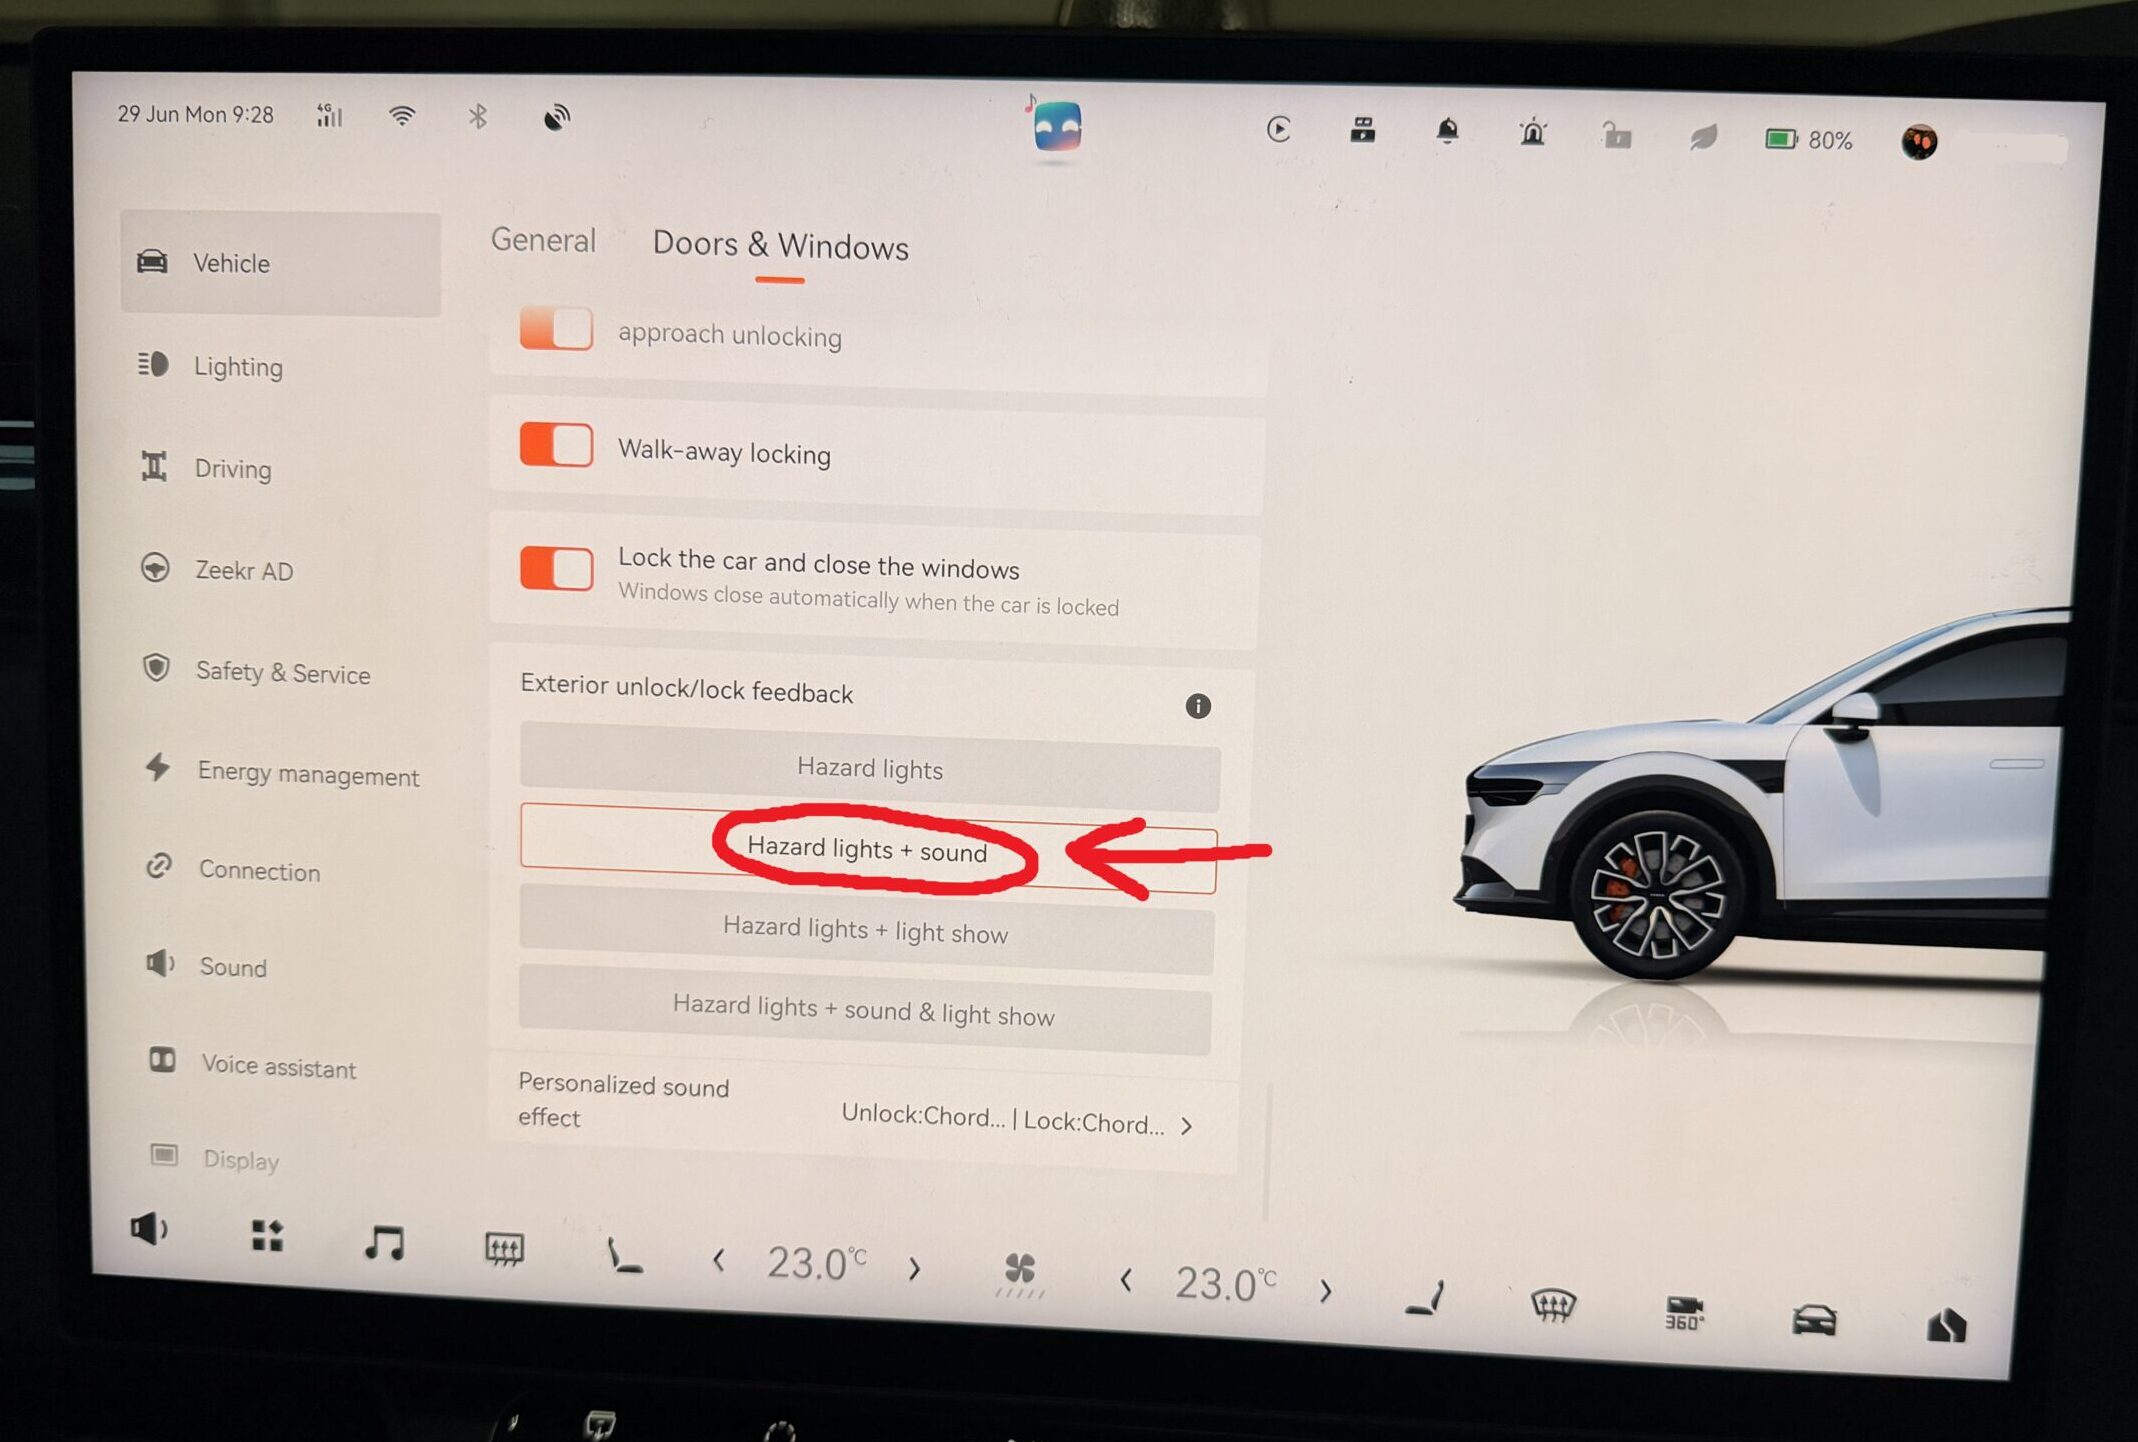
- Scroll to the sounds: Swipe upwards to scroll down to the custom sounds.
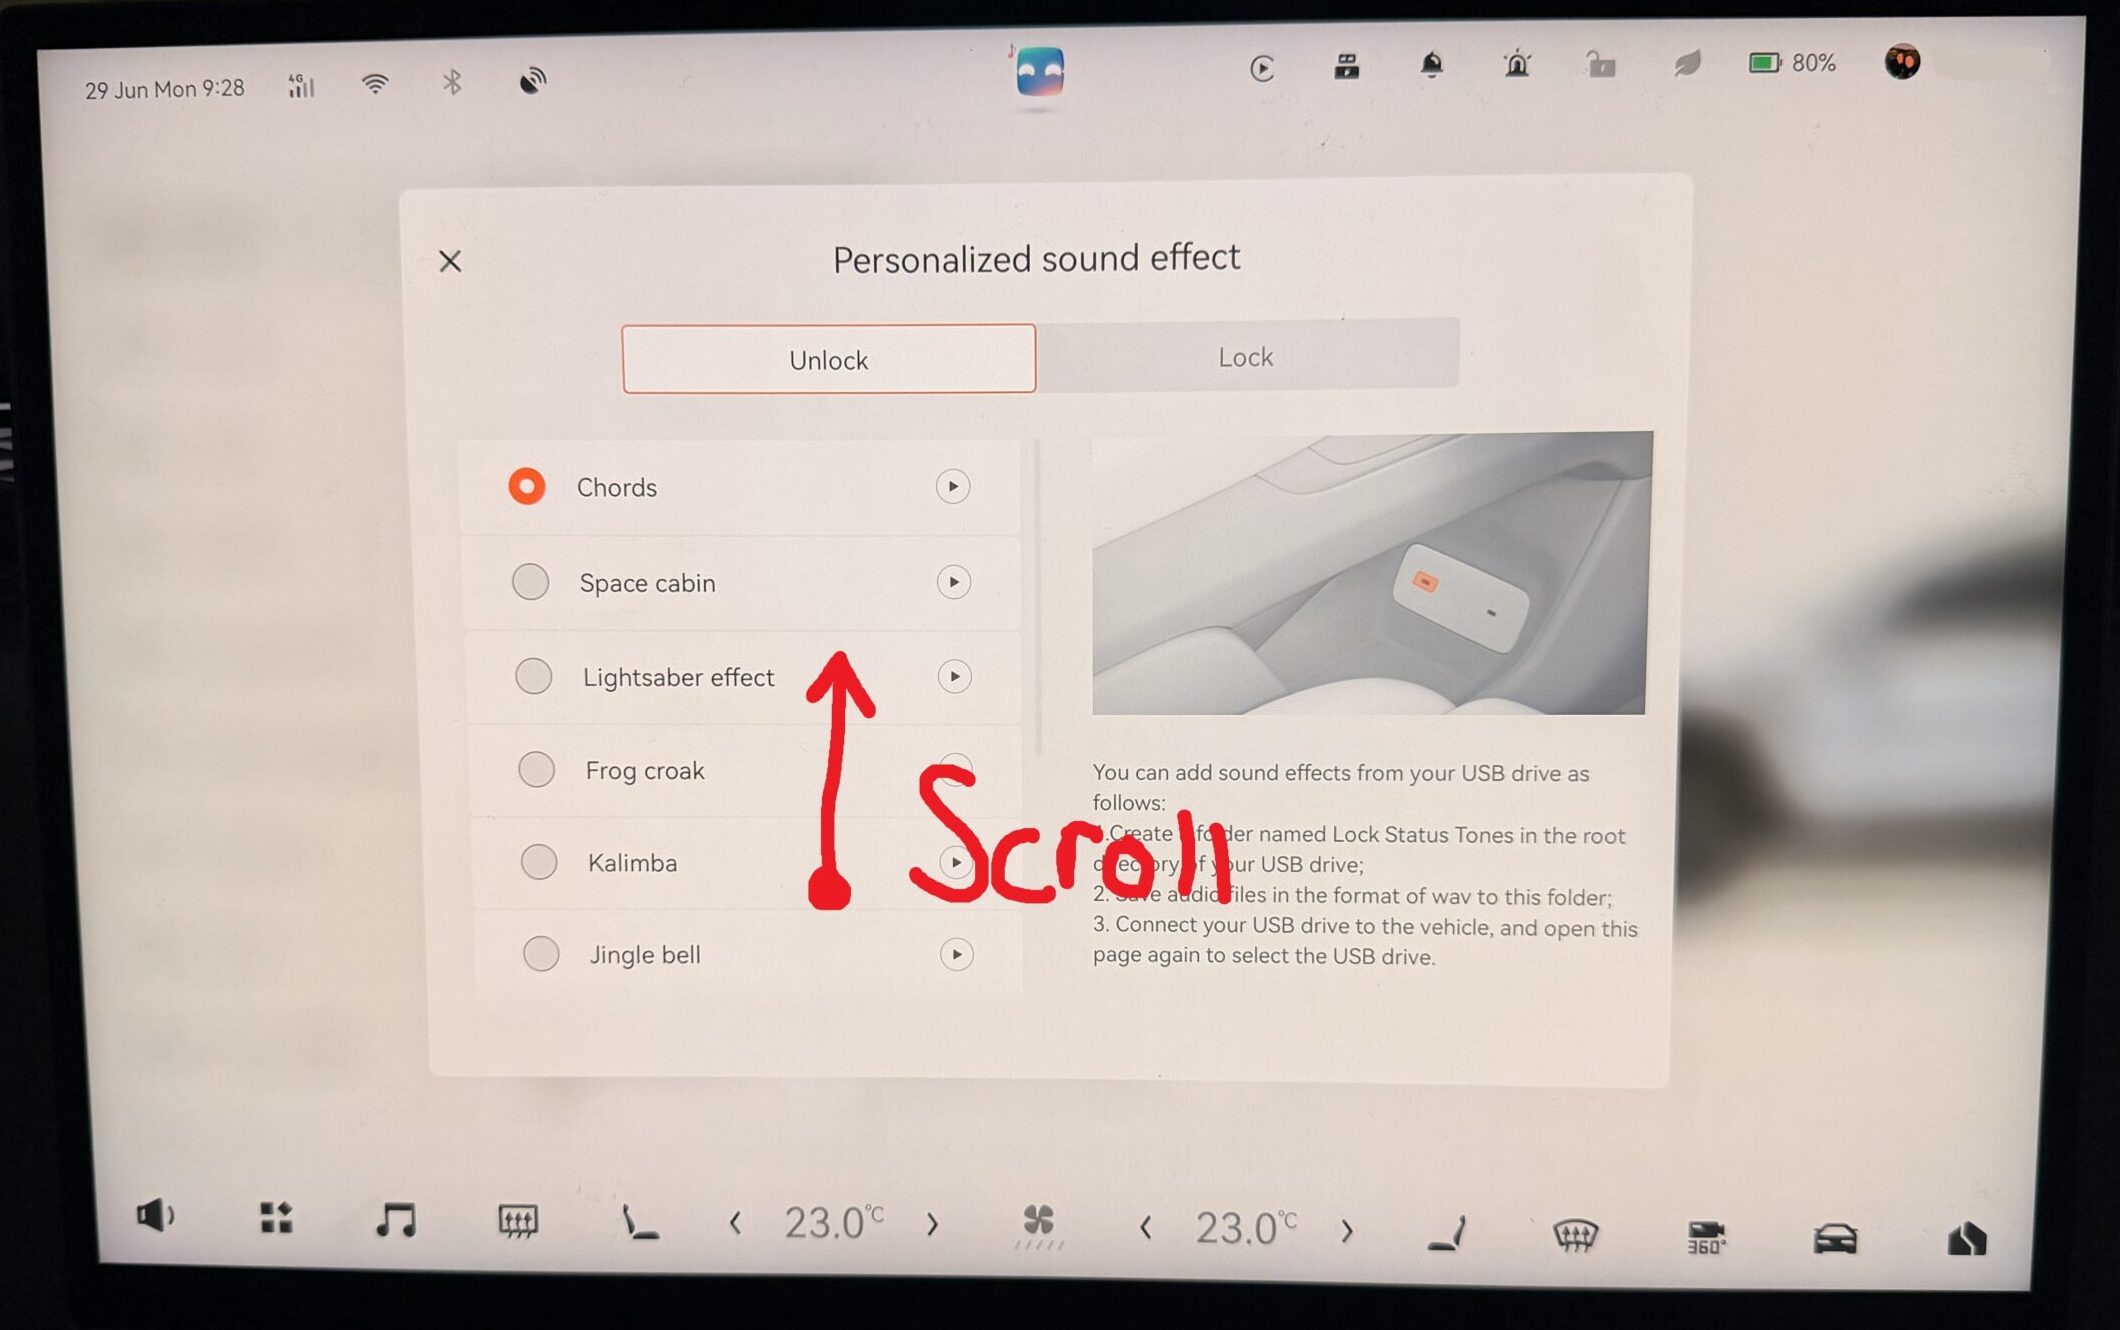
- Select Your Sounds: You should now be able to see and select your sounds, the first screen is for unlock, and the tab at the top allows you to select lock. You will need to set it for both as they can be different sounds if you like.
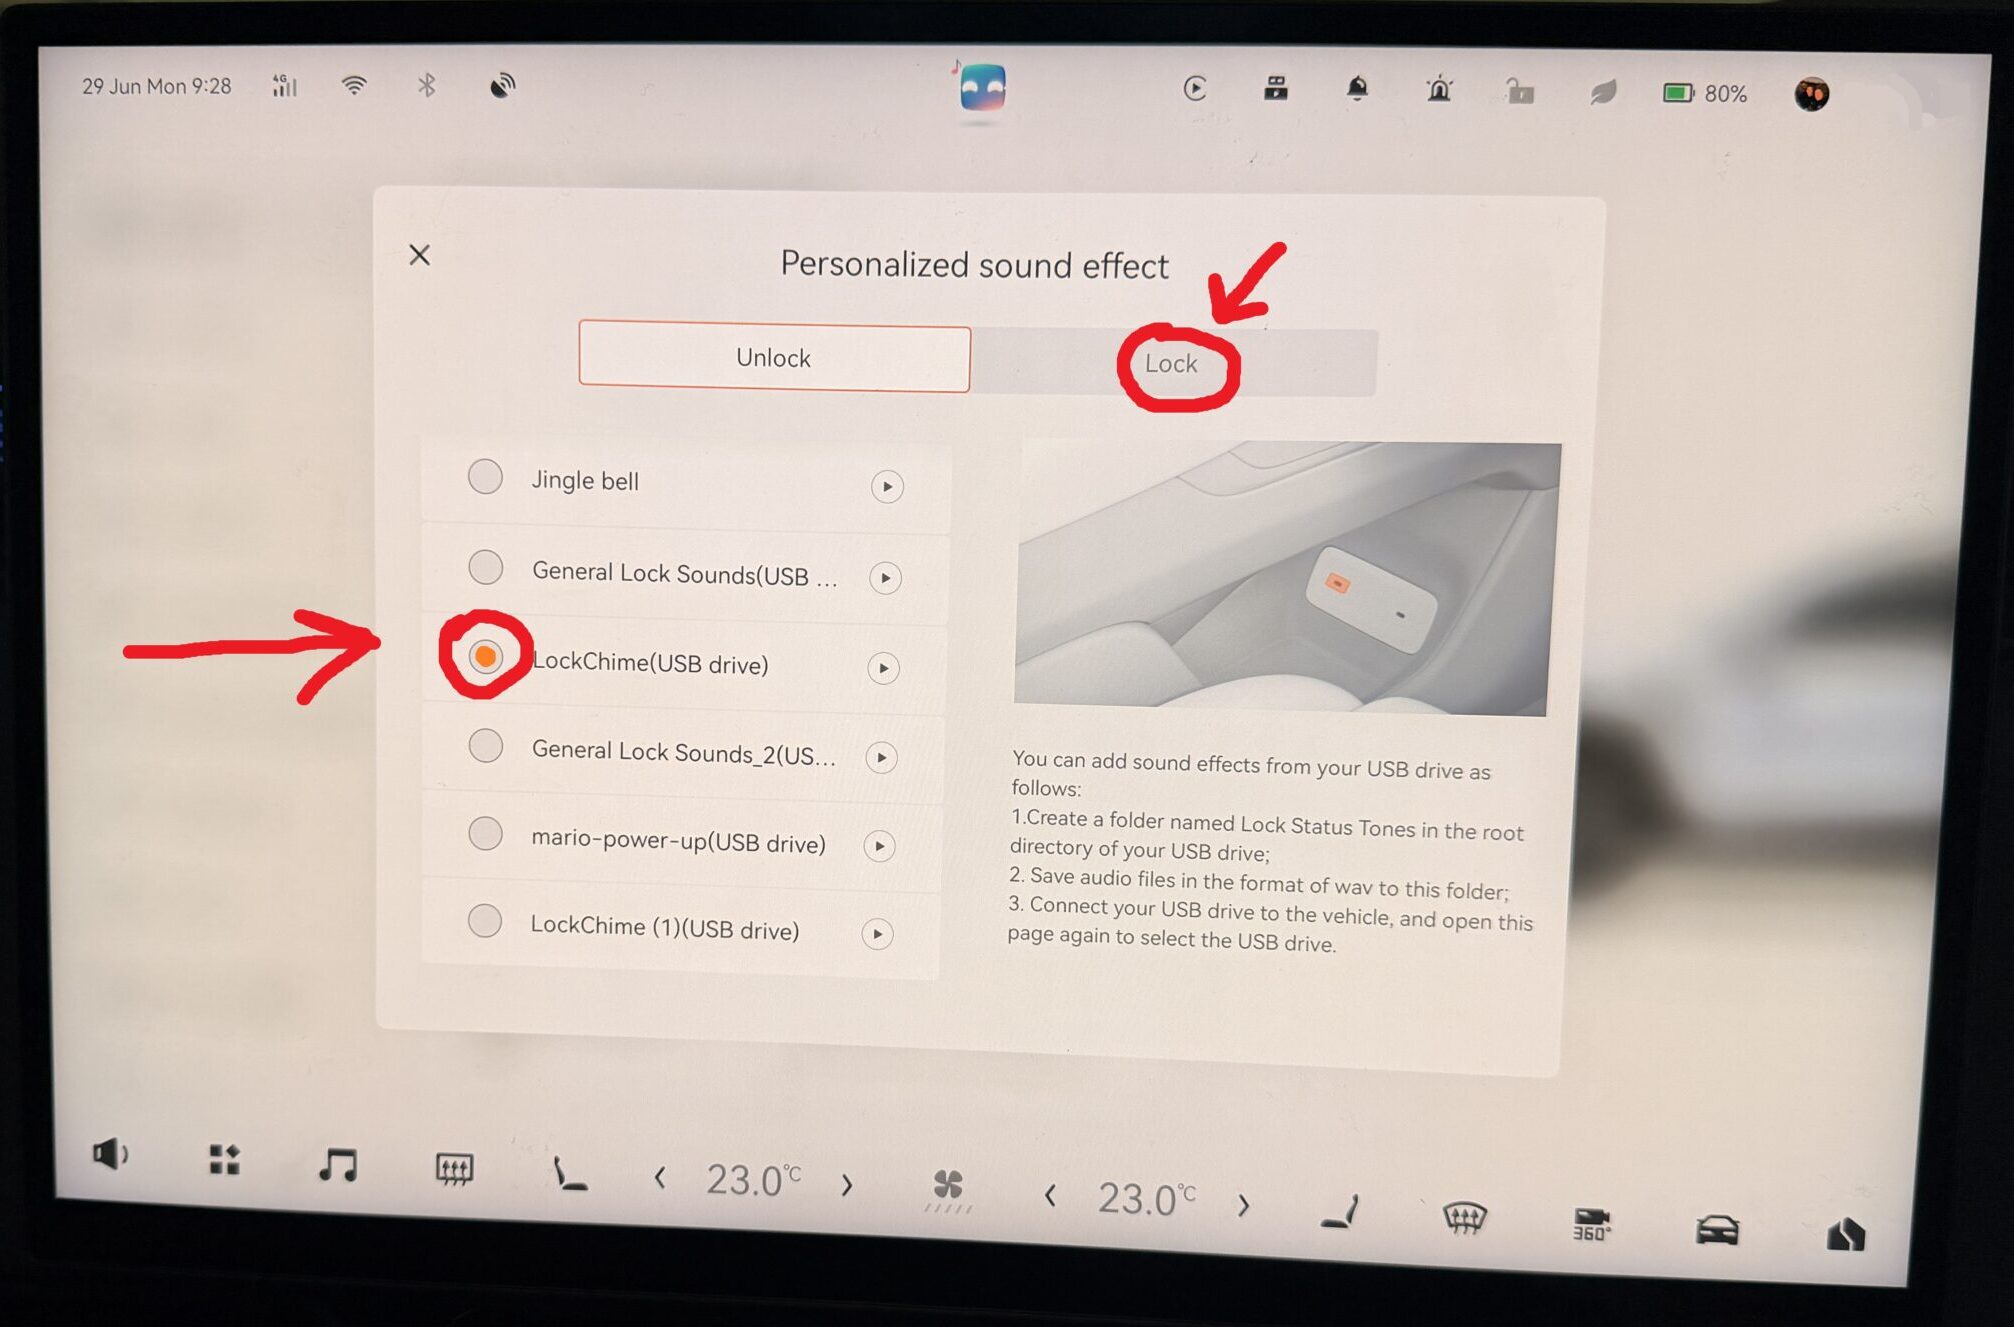
That’s it! You should now have custom lock/unlock sounds for your Zeekr!
Please let me know how you went below in the comments.
💡 Troubleshooting Quick Tips
- “No files found” error: Check your folder name. It must be named perfectly, no spelling errors and proper capitalisation.
- File grayed out: Your file size is likely over 1MB, or the bit depth accidentally saved as 24-bit or 32-bit float instead of 16-bit PCM.